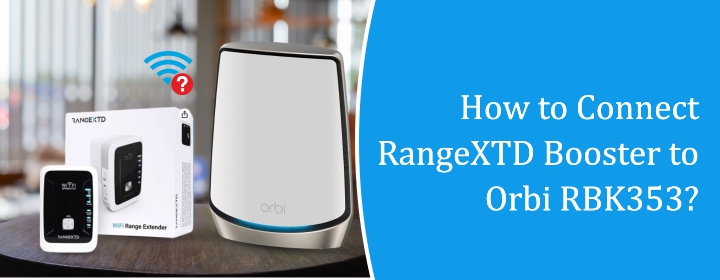
How to Connect RangeXTD Booster to Orbi RBK353?
Struggling with Wi-Fi dead zones? If you own an Orbi RBK353 mesh system and recently picked up a RangeXTD WiFi booster, you might be wondering how to get them to work together. This quick guide will show you how to connect the two devices for better Wi-Fi range and performance.
Check Orbi RBK353 Mesh System Settings
Check via Orbi App
Open the Orbi app on your device. Log into the app with the help of the MYNETGEAR account credentials. Once logged in, the app provides a dashboard with various settings and controls. From the app you can manage:
- Connected Devices: View a list of devices connected to your network.
- WiFi Settings: Change your WiFi network name (SSID) and password.
- Guest WiFi: Set up and manage a separate network for guests.
- Parental Controls: If you have Circle Smart Parental Controls enabled, you can manage content filtering and time limits for devices.
- NETGEAR Armor: If subscribed, you can view and manage your network security settings.
- Speed Test: Check your internet speed.
- Traffic Meter: Monitor your internet usage.
- Firmware Updates: Check for and install updates to your Orbi system.
- Advanced Settings: Depending on the app version, you might find more advanced options here.
Check via Orbilogin.net
Launch your preferred web browser. Type orbilogin.com into the address bar and press Enter. The login page will appear and will ask for the admin credentials. Enter your Orbi router’s username and password. The default username is usually admin, and the default password is often password.
You see the Orbi web interface. check all the settings like:
- Internet: Configure your internet connection settings.
- Wireless: Manage your WiFi network name, password, and security options.
- Attached Devices: View a list of connected devices.
- Advanced: This section usually contains more technical settings like port forwarding, dynamic DNS, VPN, and more.
- Administration: Here, you can typically change the router’s password, update firmware, perform backups, and other administrative tasks.
Set up RangeXTD Booster as Extender
With the help of WPS
- Place your RangeXTD booster in an outlet roughly halfway between your Orbi router and the area where you want to extend the WiFi signal.
- Ensure the mode switch on the side or back of your RangeXTD is set to “Repeater” or “Extender” mode.
- Press the WPS button on your RangeXTD booster.
- Within 2 minutes of pressing the WPS button on the RangeXTD, press the WPS button on your Orbi RBK353 router.
- The lights on both the RangeXTD and the Orbi router should blink, indicating they are trying to connect.
With the Help of Web Browser
- Ensure the mode switch on the side or back of your RangeXTD is set to “Repeater” or “Extender” mode.
- Open the WiFi settings on your computer and look for the default WiFi network name (SSID) broadcast by the RangeXTD.
- Once connected to the RangeXTD’s network, open a web browser. In the browser’s address bar, type the default IP address of the RangeXTD. This is often 192.168.7.234. Press Enter.
- Enter RangeXTDlogin admin username and password. The default username and password are often both “admin”.
- Once logged in, you should see a setup wizard or a menu with different modes. Select “Repeater” or “Extender” mode.
- The RangeXTD should scan for nearby WiFi networks. Select your Orbi’s WiFi network name (SSID) from the list.
- Enter the password for your Orbi’s WiFi network. Enter it carefully. Some extenders allow you to set a new name (SSID) for the extended network.
You can choose to keep the same name as your Orbi’s network for seamless roaming or create a new one to easily identify the extended network. Click Apply, to save your settings. The RangeXTD will likely reboot.
Set up RangeXTD Booster as Access Point
Take an Ethernet cable and connect one end to an available LAN port on your Orbi RBK353 router. Connect the other end of the Ethernet cable to the Ethernet port on your RangeXTD booster.
Plug the power adapter into your RangeXTD and turn it on. Locate the mode switch on the side or back of your RangeXTD. Slide or switch it to the “AP” or “Access Point” mode.
Connect to the RangeXTD’s default WiFi network or directly via Ethernet to configure its settings. Open a web browser on your connected device.
In the address bar, type the default IP address 192.168.7.234 of the RangeXTD, press Enter. Enter the default username and password are often both “admin”.
Once logged in, navigate to the wireless settings. Here, you can set the name (SSID) of the new WiFi network that the RangeXTD will broadcast. Choose a name that helps you identify this network. Set a strong and secure password for this new WiFi network. Save your settings. The RangeXTD will likely need to reboot for the changes to take effect.
The Conclusion
By leveraging either the extender or access point functionality, you can effectively broaden your network’s reach and provide consistent connectivity to all your devices, no matter where they are located. From this post, you have learned about how to connect the RangeXTD booster with the Orbi RBK350 mesh system.
FAQs
1. How to Change frequency of the booster?
Access the booster setup window through the 192.168.7.234 in your computer’s web browser. Go into the settings and open the Wireless Settings. Select the Frequency Channels and change frequency of the device 2.4GHz or 5GHz.
1. How to change WiFi password of RangeXTD?
Access the interface > Go into the settings > Open the Wireless Settings > Select SSID option or tab > enter new WiFi password > SAVE Settings to apply the changes.